Halloween Party Spread

Alicia and Dana throw amazing parties. And the best aspect about their parties? Their fabulous spread of food. They put a lot of effort and time and thought into coming up with a creative and delicious spread of finger foods. Here are a few pictures of their Halloween spread. I've been to several of their parties and this spread was my favorite by far. Kudos to Alicia and Dana for doing such a great job.


Mummy Cupcakes, a Pumpkin vomiting Guacamole, brain dip, apples with caramel dip, a bean pate face, crackers, dates stuffed with walnuts and other goodness, black french onion dip with carrots and red pepper strips, shortbread cookie fingers, eyeball eggs.


Close up of the Face dip. So cool! Look at the attention to detail!


A few people said they didn't want to touch the Guacamole vomit. I think it looks fabulous.


These fingers were delicious. I had several. I wanted the ones with extra bloody stumps. 

Product Review: Special K with Fiber


Foodbuzz gave us as Tastemakers an opportunity to test out Kellogg's newest incarnation of the Special K brand, Special K with Fiber. As someone who has digestive difficulties, getting fiber into my diet is very important. I can't stress enough the importance of digestive health for your physical and emotional well-being. With all the different types of food we eat, especially ones that are rather difficult to digest, having some fiber helps things along so to speak.

Now, I've been taking a daily dose of ground flaxseed daily. I usually sprinkle it on my cereal. Fiber cereal plus flaxseed? Overkill! It was too much for me. I need a lot of help so I couldn't really do without the flaxseed. However, if you need a little bit of help and want a cereal that is low in calories, delicious, nutritious and has the added benefit of having fruit, I would highly recommend Special K with Fiber.  If you are like my beau Carlos, and a little bit of fiber is already too much, then I would recommend just trying another Special K cereal without the added fiber.

What you may not know, is that before I started taking flaxseed I had lots of digestive issues.  My gastroenterologist declared my digestive system "lazy". Basically, it takes me longer to digest than your average person. Some days, I would feel just rotten. My stomach felt like someone detonated a hand grenade inside. So on those days, I would try to just eat a bowl of Special K cereal for dinner. It was mild enough that my stomach would have a relatively easy time digesting it.

Now Special K is advertising that the added fiber helps with weight loss. I'm no nutritionist so I can't vouch for that. They have a money-back guarantee that the low calorie and high fiber cereal will help with your weight management. I don't think that that is where the strength of the cereal lies but far be it from me to tell the company how to pitch their product. I encourage you to try this cereal if you have some relatively mild digestive issues and want to start off your day by giving your system a boost.

Thank you to Foodbuzz for sending me a box of Special K with Fiber (red berries) to try out!

Weekly Meal Planning


How do you plan what you are going to cook for the week? Or do you plan at all?

I plan my meals for the week, every week, for various reasons.

  1. It gives me a ready answer for that daily question "What's for Dinner?". 
  2. It forces me to buy only what food I need for that week. 
  3. It allows me to use that food efficiently and by the end of the week the refrigerator is significantly emptier than it was at the beginning. 
  4. It allows me to schedule time for more complicated cooking adventures.


Every Friday, I plan the week's dinners, from Saturday to the following Friday, and I shop for the ingredients either on Friday evening or Saturday morning. When planning, I keep in mind my busy schedule. On days I have off, like Saturday and Sunday, I have more time to experiment with new dishes or ones that require more preparation or cooking time. On weekdays, I opt for quicker meals or slow-cooked ones that I can prep early in the morning and have them done by that evening. I also keep in mind any social events or gatherings I go to where there are food or any time I go out on a date with my beau Carlos. In those instances, I don't cook and I won't buy any food for those evenings. To keep myself on a budget, I try to chose meals that don't require expensive ingredients and serve a dual-purpose: dinner that night and leftovers the next day. This usually works but there are some instances where I don't even want to look at the meal the next day. If I do an unusual weekday experiment, sometimes I will plan not to have leftovers the next day and will plan and buy ingredients for a lunch accordingly.

I break out the plan by day and by type of meal. For the most part, I am planning dinners, lunch leftovers and a Sunday brunch, but if there is something really special I'll make sure I'll allot time for that. This is how I laid out this week's meal plan.


Saturday 
D - Lentil Soup

Sunday
B- Lemon Ricotta Pancakes and Bacon
D - Lasagna with Salad and Garlic Bread

Monday
L - leftovers
D - Steak, Roasted Potatoes, Green Beans, Bowtie Pasta with Marinara

Tuesday
L - leftovers
D - Lemon Pasta with Chicken and Asparagus

Wednesday
L - leftovers
D- Three Bean Chili with Cornbread

Thursday
L - leftovers
D - Cookin' Canuck's Smoked Paprika Chicken with Rice and Corn


Friday
L - leftovers
D - OUT - Carlos' treat

Once I plan out my meals, I look at each meal and see what ingredients I need and what I already have in my kitchen. Then I create two shopping lists. One will be for Market Basket where I buy my packaged foods, dairy products, meats, fish or poultry, cereals, frozen goods, canned goods, etc. Then I'll make a list for Wilson Farm which will consist entirely of fruits and vegetables. I try to make these plans and lists on the computer so that I can easily edit them. For the shopping lists, by now I'm so familiar with the two markets I shop at, that I organize my list in order of where the items appear in the store. No joke! After shopping somewhere for a few years or even a few months, you become familiar with the landscape of the market. Use this to your advantage. If your list is in order of appearance, it will facilitate more efficient shopping and will prevent you from missing something on your list (or having to back to an aisle on the other side of the busy market, don't you hate that?). I only do grocery shopping once a week and I try to avoid missing anything that will require me going back during the week. 

I will often organize my meal plans so that any dinners that require vegetables or meats that go bad really quickly are made earlier in the week and other ingredients that last longer or are frozen are used later in the week. With meats and poultry, sometimes I will freeze the Wednesday, Thursday and Friday meats when I buy them on Saturday and I'll keep the rest of them in my refrigerator's meat drawer.

I also print out my menu plan and keep it in an accessible place in the kitchen. That way, if I ever forget what I planned for that evening, I have my list handy to remind me. Also, if I'm using a recipe I got from a cooking website or blog, I will write out the URL so I can refer to the recipe quickly.


How do you plan your meals?
Do you have any money-saving or time-saving tricks?
If you don't plan your meals, how do you shop?
How often do you shop and why?

Please share your thoughts!

Eating Healthy at the Olive Garden


Kate over at Scathingly Brilliant wrote a few times recently about her love for Olive Garden. She made a very fine point, that even though it's a chain restaurant and a lot of people give it grief, it does offer a great menu and very nice ambiance. This is what Kate said:
People here knock Olive Garden all the time because it isn't authentic enough, and they're right -- the food from the real Italian restaurants here is out of this world! It's just that the atmosphere combined with the food and the rarity of going there makes Olive Garden a special treat to me. The food at the real Italian places might be better, but sometimes I want that stucco surrounding and dim lighting instead of plastic booths and framed, signed photos of all the NJ governors.
That's actually very true. Chances are your local Italian restaurant doesn't have the same ambiance as the Olive Garden. And if you want that atmosphere, you'll have to be willing to dish out some serious $$$ (1 and a quarter - $125 for two people as my beau Carlos likes to say) for a fancy Italian restaurant. For most of us, it's just not in our budget and while the Olive Garden isn't the cheapest place around it's the closest a lot of us will get to a nice Italian dining experience without breaking the bank.

Kate inspired me to take a field trip out to Olive Garden. I hadn't been in years because let's face it, I love the Olive Garden but it doesn't love me. I contribute some of my stomach problems (lactose intolerance and inability to thoroughly digest big meals) as well as the cellulite on my thighs and jiggle on my stomach to all of those Olive Garden meals I've had over the years. The last time I ate there I got so physically ill that I swore off the Olive Garden forever.

But I miss the Olive Garden and Kate made me nostalgic for that experience. Even though I won't be an Olive Garden regular any time soon, I thought I would try to make one visit and eat as healthy as I can.

Before I went to the Framingham, MA location, I researched the Nutritional Values of Olive Garden's various options for lunch. (Lunch is automatically healthier for you because the portions are smaller but it's only served during the week). Olive Garden hides it pretty well but they have a Nutritional page with all the calorie counts for their various meals.

Now let's say you went to the Olive Garden and got an appetizer, meal (along with the soup or salad that comes with it), and a dessert. A 4-course meal. How much would that cost you health-wise? I picked out my top favorites from the menu and took a look at the total calorie counts. The end result was quite shocking.

Appetizer: Stuffed Mushrooms - 280 calories
Salad: Garden Fresh Salad with Dressing - 350 Calories
or Soup: Pasta E Fagioli 130 Calories
Breadsticks: 150 calories each (I would have 3)
Meal: Seafood Portofino: 800 calories (ouch)
Dessert: Tiramisu 510 calories

Total: 2,160 to 2,380 calories

The recommended daily calorie intake for someone my age, height and weight is 1,500. I would have blown all of that in one single trip to Olive Garden. Granted, I may not go for the appetizer, I may not eat all of my meal and I might split my dessert with someone. But it still adds up.

So I chose my menu in advance.


Salad: Garden Fresh Salad with Dressing - 350 Calories


Soup: Minestrone - 100 Calories


Dessert: Vanilla Cream Soda - 190 Calories
Delicious and more than enough as a dessert! (Thanks to Kate for mentioning it on her blog)

That's 640 calories. Much much better but still quite a lot. The salad and the minestrone both had a lot of veggies so I felt good about choosing both as my meal. And quite a meal it was, I didn't even finish the whole thing.


I had 1-1/2 breadsticks so I would have to add 225 calories back on to my total. But considering I didn't eat the entire meal, I want to say that my total calorie count was probably anywhere from 650-750 calories. I left the Olive Garden feeling like I didn't over-indulge and that I successfully stuck to my diet. That's a much better feeling than indigestion and I'll take that any day.


I love that Olive Garden still sends off each customer with two Andes mints. I've been eating Andes since I was a little girl and I love to see them keep on as a tradition at this restaurant. Two was all I needed to feel like I had a special treat after my great meal.


The waitress (who was very nice, I wish all waitresses were like her) told me that she sometimes has clients who will consume 6 bowls of soup. Why? I know it's a deal but good grief that's a lot of soup. I think culturally, we value a good deal over health when it comes to eat out. You can spend very little money at a buffet and get lots of food but the cost to your health should be considered as an extra expense.

It pays to be aware of the calories and portions of food you are eating. If you have to indulge, make sure you take some of your meal home with you for leftovers. Spread the calories over time so you can burn them effectively. Don't make these huge meals a regular event. When you do go out to eat, make sure you are smart about your choices and to stop eating when your stomach feels full. That way, you can still eat anywhere you want, even at the Olive Garden.

How To: Lighten - Caramel Apple Muffins


One of the food blogs you must follow is How To: Simplify. It's a superb site and the blogger provides lots of great tips on how to improve your cooking skills and pairs them with wonderful recipes and gorgeous food photography. My favorite recipes to make from this blog are the Corn & Zucchini Salad, Pasta Salad and the Taco Soup. Recently, she posted a recipe for Caramel Apple Muffins along with a tutorial on the best ways to get muffins out of a muffin tin. I just had to try these muffins.

So about a week ago I made these. At first I thought, wow these have a lot of sugar in them. I took down the 3/4 cup of sugar the recipe called for to 1/2 cup but made no other changes (except to switch out regular Milk for Almond Milk). The muffins were absolutely delicious but I was a little bothered by how high in sugar and fat they were. They batter contained sugar, butter and chopped caramels and the topping contained brown sugar and butter. The topping, since it was so heavy with sugar, pretty much melted right off the top which defeated the purpose. So I asked myself, could I make these with less sugar and less fat but retain all the deliciousness?

Today I tried making these again with some key adjustments:

1/4 cup butter was replaced with 1/4 cup of extra light olive oil
12 chopped caramels went down to 6 caramels
I still kept Almond Milk in place of regular milk
3/4 cup of granulated sugar went down to 1/4 cup
I removed the brown sugar and butter from the topping and used extra light olive oil instead

And here is the result...

Ingredients:

2 cups of flour
1/4 cup of sugar
1 tablespoon of baking powder
1 teaspoon of cinnamon
1/4 teaspoon of nutmeg
1 teaspoon of salt
1 egg
1 cup of Unsweetened Regular Almond Milk
1/4 cup of extra light olive oil
1-1/2 teaspoon of vanilla
1 Granny Smith apple, peeled and chopped
6 caramels chopped

1/4 cup of oats
1 tablespoon of extra light olive oil

This makes a dozen muffins.

Preheat your oven to 350 degrees. Mix all the dry ingredients into a bowl then add the egg, milk, olive oil and vanilla. Mix until all those ingredients are thoroughly incorporated into the batter. Fold in the chopped apple and caramels.

Take a muffin tin and spray with baking spray. Evenly distribute the batter among the 12 cups. In a small bowl, mix the oats and the tablespoon of extra light olive oil. Distribute the topping evenly over the 12 muffins.

Bake for 20-25 minutes. Let rest for a bit and remove from tin.

These muffins came out a little sturdier than the original. They have more bite and less crumble. You can taste the tart of the apple better. They hold together better too. The oatmeal topping comes off a bit so many next time I would add just a teeny bit of brown sugar to the mix to help it stick. Otherwise, delicious! Enjoy.

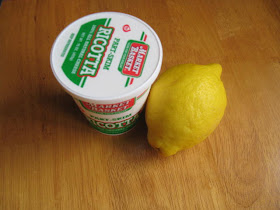
Lemon Ricotta Pancakes


I make these every Sunday without fail. Well, almost without fail. On occasion, I'll do something different like Pumpkin-Apple Pancakes. I've been making these regularly ever since I encountered Bobby Flay's recipe in an issue of Parade magazine (cue in Stewie from Family Guy proclaiming You read Parade magazine?! ::slap::). The original recipe suggested drizzling lemon curd over the pancakes and topping them off with raspberries. I've adapted the recipe over time and skipped the lemon curd and raspberries and replaced them with sliced bananas because it makes the dish easier, cheaper and reduces the sugar content. I have changed so many things about the recipe that now I'm comfortable with calling it my own. And thus, I'm comfortable posting it. I hope you'll try these pancakes. The ricotta cheese makes them soft and moist. It's a very light recipe in terms of both texture and calories. It has no buttermilk and it's light on flour so these are spongy rather than cakey. You'll never want to go back to regular pancakes ever again. I guarantee it.

Ingredients:

1 cup of flour
1 tablespoon of baking soda
2 tablespoons of sugar
1 teaspoon of salt
1 cup of ricotta cheese (part-skim)
2/3 cup of Almond Milk
2 eggs
Juice and Zest of one Lemon
dash of nutmeg (optional)

sliced bananas
drizzling of maple syrup

butter for greasing the griddle

Makes 6-8 pancakes.


Add the dry ingredients to a bowl and mix. Add all the wet ingredients (Almond milk, eggs, lemon zest and juice, ricotta cheese) and stir until everything is incorporated. You can make the batter the night before and let it rest in the refrigerator. Just make sure that you cover it with plastic wrap and have the wrap touch the surface of the batter. Otherwise, it'll create it's own skin.

Heat up a griddle (medium low is my preferred temp so I don't burn these) and grease with some butter. Add some of your pancake batter until it's about the size you want it. When the top of the pancake has a lot of popped bubbles, it's time to flip it over. Flip it and cook for a minute more then remove from griddle. Repeat until you've used up all the batter.

Enjoy with some sliced bananas and maple syrup. These are also really good with sliced nectarines and/or peaches and some raspberries.

Frozen Peanut Butter Pie with Cookie Crust and Dark Chocolate Drizzle


Which shot looks better?

I got the idea of making a Chocolate Peanut Butter Pie from the cookbook Simply Suppers. As I said in my review of the book, the recipe was too calorie-laden and I went elsewhere for a lighter recipe. I adapted the recipe a bit, replacing regular milk with Almond Milk, adding less whipped topping and also using dark chocolate drizzle over the top. The result? Heavenly. And although I usually don't ever make more than one pie at a time, there is something so satisfying about making this Frozen Peanut Butter pies in twos. It'll go quickly so I encourage you to make two and share with friends and loved ones.

Ingredients:

8 oz package of cream cheese, softened
1-1/2 cups of confectioner's sugar

1 cup of peanut butter
1 cup of Almond Milk (vanilla flavored)
1 12 oz container of fat free frozen whipped topping, thawed

container of dark chocolate for melting (Baker's)

2 pre-made Oreo cookie crust pie shells

This makes two pies.

Add the cream cheese and confectioner's sugar to a large bowl. Mix together a little bit with a spatula. This is to prevent all the sugar from flying out the bowl when you mix it properly. At a low setting, use a hand-held mixer to cream the cheese and sugar together. Then add the peanut butter and Almond Milk to the bowl and mix with the hand-held mixer at low. Once everything starts to incorporate, turn it up to high and mix until it's really creamy and smooth. Carefully fold in the thawed whipped topping and mix with a spatula (folding rather than stirring) until everything is combined.

Melt your dark chocolate in the microwave per the package instructions. Set aside.

Add the peanut butter mixture to the two pie shells. Drizzle the dark chocolate over the top with a spoon. Don't worry about getting globs of chocolate on there.

Freeze the pies for 2-3 hours uncovered. Then cover with plastic wrap and keep frozen. Allowing them to freeze uncovered prevents the plastic wrap from warping the filling or the chocolate drizzle.

Slice and serve cold.

Recipes inspired by They Died With Their Boots On (1941)


Roast Chicken, Scallions, Potatoes Au Gratin, Roasted Asparagus, Creamed Pearl Onions and Spiced Pears in a Red Wine Sauce.

This meal is inspired by the film They Died With Their Boots On (1941). Please check out my post on my movie blog, Out of the Past ~ A Classic Film Blog, for more information on how I came to create this meal.


Roast Chicken

Ingredients:
Whole Chicken, rinsed and patted dry
1/2 a lemon cut into 4 wedges,
1 small onion peeled and cut into wedges
a few tabs of butter
salt and pepper to taste

Preheat oven to 400 degrees.

Salt and pepper the cavity of the chicken as well as the outside (don't forget to remove that bag of extra bits from the cavity). Add the onion and lemon wedges to the cavity and slide tabs of butter underneath the skin where you can, namely on the breast and drum sticks. Tuck under the wings and transfer your chicken to a roasting pan. Cover with aluminum foil and cook for 2 hours then remove foil and cook for 30 more minutes or until the skin is nice and golden. Let rest for 15-20 minutes and serve. You can cook the bird without the foil but you'll need to baste, baste, baste a lot!


Potatoes Au Gratin

Ingredients:
3 or 4 large potatoes, peeled, halved and sliced into thin half moons
Shredded Gruyere cheese
half-and-half
butter
salt and pepper to taste

Preheat your oven to 375 degrees or add this for less time in the oven with the roast chicken.

Butter the bottom of a casserole dish and add a layer of sliced potatoes. Salt and pepper the potatoes and top with some shredded Gruyere (based on taste, I went very light). Create another layer of potatoes, salt and pepper and Gruyere. Keep doing this until you get to the top of the casserole dish. Then top it off with a few knobs of butter and drizzle some half-and-half. I'm not giving exact measurements because it'll be based on taste. I used about 1/4 cup but you can use more or less. Just make sure it's even distributed.

Cover the casserole dish with aluminum foil. Bake in the oven for 40 minutes at 375 or 30 minutes at 400. Remove the aluminum foil then broil the top at the low setting until the top gets nice and golden and the edges are a little crispy. Let cool for a few minutes then serve.


Roasted Asparagus

One bunch of asparagus
2 tablespoons of very light olive oil
salt
lemon zest

Snap off the tougher ends of the asparagus stalks and add them to a baking sheet. Drizzle the olive oil over the asparagus and move them around so they are thoroughly coated in the oil. Spread them evenly on the sheet and salt them. Add them to your 400 degree oven, you can even put them on a lower rack beneath your roasting chicken. Cook for 10 minutes. A little more if you like the tops to be crispy. Remove from the oven, add a little finely grated lemon zest on top and let cool.

Creamed Onions

1 bag of frozen pearl onions
1 cup of half-and-half
1 tablespoon of butter plus a bit more
1 tablespoon of flour
salt, pepper and nutmeg
2 tablespoons of breadcrumbs

Preheat oven to 375 degrees or 400 degrees to cook with the chicken.

Add the bag of frozen pearl onions to a pot of water (make sure water covers the onions by at least one inch) and bring to a boil. Cook for 20 minutes, drain and set aside. In the same pot, add butter and melt then sprinkle in flour. Mix thorough then slowly add the half-and-half little by little, incorporating the roux into the cream making sure there are no lumps. Season with salt, pepper and nutmeg. Cook at medium-low until the sauce thickens. Add the cooked pearl onions and coat with sauce. Butter a small baking dish then add the onions with sauce. Top with breadcrumbs. Bake uncovered for 30 minutes in a 375 degree oven or 20-25 minutes in a 400 degree oven until it's bubbly.


This is a recipe created by Ellie Krieger of Food Network fame. You can find the original recipe here. I've modified it slightly

Spiced Pears Poached in Red Wine

4 Pears peeled and with bottoms cut off
2 cups of red wine
1/4 cup of sugar
2 inch strip of orange peel
the juice of one orange (I used a Cara-Cara orange)
2 cinammon sticks
3 cloves

Add wine, orange peel, orange juice, cinammon sticks and cloves to a pot and bring to a simmer. Add the pears and cook for 15 minutes, turning them every five minutes. Remove the pears carefully and stand them up on a plate. Transfer plate to the fridge. Remove peel, cinammon sticks and cloves from the pot. Bring the liquid to a boil and simmer down to a syrup for 10-15 minutes stirring occassionally. Then let the syrup cool and set aside. When you serve, drizzle some of the syrup on top of the poached pears. Enjoy!