And the winner is...

The winner of the Progresso High Fiber Soup giveaway is...

PJowens75!


PJowens75, please contact me at QuelleLove at gmail dot com at your earliest convenience.


Thank you to everyone who participated. I hope to have another giveaway on here very soon.

Candy Cane Cookies


Betty Crocker recently sent out a newsletter containing 25 of their best holiday cookie recipes. I really wanted to try another variation of Candy Cane cookies as my last attempt turned into delicious yet flat and breakable candy cane pancakes! I wanted nice bulky candy cane cookies and the Betty Crocker recipe worked out beautifully. It's a little time consuming as you have to roll balls of dough into thin logs then twist them and shape them into canes. I am not good at any type of baking that requires dexterity or delicacy so this was a bit of a challenge for me. Also, I stained my hands red the last time I made these cookies because I mixed in the red food coloring by hand into already prepared dough. SO this time, I split the recipe in half and mixed the red food coloring into melted butter and avoided stained skin. The original recipe calls for letting the dough sit for 4 hours. If you want to do that, knock yourself out, but I didn't think that was necessary.

I hope you'll give this a try. It's a simple recipe that is suited perfectly for the holidays and gives you delicious and eye-catching results. Happy Holidays!


White Peppermint Cookie Dough
1/2 cup sugar
1/2 cup butter melted
1/2 teaspoon of vanilla
1/2 teaspoon peppermint extract
1/4 cup milk
1/2 an egg
1-3/4 cup flour
1/2 teaspoon baking powder
1/8 teaspoon of salt

Red Peppermint Cookie Dough
1/2 cup sugar
1/2 cup butter melted
1/2 teaspoon peppermint extract
1/2 teaspoon of red food coloring
1/2 teaspoon of vanilla
1/4 cup milk
1/2 an egg
1-3/4 cup flour
1/2 teaspoon baking powder
1/8 teaspoon of salt

Finely crushed candy canes for sprinkling (optional)

-----

Preheat oven to 360 degrees

You can simultaneously make both cookie doughs. Start with two bowls and mix flours, baking powders, sugars and salt in each.

In two small microwaveable bowls, melt 2 sticks of butter (1 per bowl). Let cool. Then stir in peppermint extract and vanilla in both and then red food coloring in one. Set aside.

Take one jumbo egg (or if you have two small eggs use 1 per dough) and whisk. Carefully pour half of the egg into each bowl.

Add milk and butter mixtures to both bowls. Mix batter thoroughly. Don't use a wooden spoon for the red dough because you'll end up with a red spoon!

Scoop small spoonfulls of each batter and roll into 1 inch balls. Then roll them between your hands into long 3 or 4-inch ropes. But one white and one red rope side by side and roll them together. Twist them a bit then roll. Twist them more and roll. Don't put too pressure at this point as you want them to stay that original length. When the roll is swirled so it looks like a candy cane swirl, add to a foil-lined baking sheet and curl the top so it looks like a cane. You can pinch the ends if you want but it's not necessary.

Bake in the oven for 10 minutes. Take out and immediately sprinkle with crushed candy canes. You need to do this to hot cookies or they won't stick. Let cool and enjoy!

Candy Cane Cookies on Foodista

Cherry-Vanilla Almond Muffins


Ever since Panera discontinued their Cherry-Vanilla Bagels from their seasonal menu, I've been suffering serious withdrawl symptoms. I needed some kind of cherry-vanilla fix so I decided to come up with my own dessert to satisfy my cravings.

Ingredients:

2 cups of flour
1/2 cup of brown sugar
3/4 teaspoon baking powder
1 teaspoon baking soda
1/2 teaspoon salt

1 stick of butter melted and cooled
1/2 cup sour cream
2 eggs
2 tablespoons of vanilla*

1 cup of dried cherries
some brown sugar & sliced almonds for sprinkling

*use high-quality vanilla. This is a lot and any of that alcohol stuff you get
at the supermarket just won't cut it.

Yield: 1-1/2 dozen mini muffins or 1 dozen larger muffins

Preheat your oven to 350 degrees.


Mix flour, baking powder, baking soda and salt in a bowl. Then add brown sugar and and dried cherries and mix into the dry ingredients.


Add the 2 eggs, sour cream, melted butter and vanilla to the dry mixture. Mix thoroughly until you get a nice thick batter.


Scoop large spoonfuls of batter into cupcake liners. I made 18 mini muffins but 12 larger muffins would work better. Sprinkle each with brown sugar and some sliced almonds. Bake in the preheated oven for 18-20 minutes until a toothpick inserted comes out clean.


Enjoy with a nice hot cup of tea!
Muffins on Foodista

Thoughtful Eating at the Office Craft Fair

My office had a craft fair in which employees that are creative on their own time can bring in their goods to showcase and to sell. I decided this was a good opportunity to showcase my talent as a baker. So last Tuesday, I brought in baked goods that I have posted about here on Thoughtful Eating.

I spent the night before baking and trying to figure out how much I wanted to sell each item for. I wanted my goods to be affordable but I also didn't want to lose money.

The craft fair was held in a conference room and I had one corner of a large table. Here is what the set up looked like:


I sold Vegan Almond-Raspberry Chocolate Cupcakes for $0.50 each.


I sold miniature Chocolate Chip-Banana Bread loves for $3.00 each. One of the loaves came out smaller and had a corner missing (from not coming out completely from the loaf pan), so I downpriced that loaf to $2.00.


Finally I did bags of Hazelnut-Toffee-Chocolate Chip cookies for $1.00 a bag. Each bag contained 2 cookies.


I even had Thoughtful Eating business cards for people to take. These mini-cards were created by Moo and came from my sponsor Foodbuzz. It was a great opportunity to get some folks acquainted with my blog.


In all I made $27.00. I sold all 9 bags of Cookies ($9), all 5 breads ($14) and 8 out of the twelve cupcakes ($4). In hindsight, I shouldn't have labeled the cupcakes "vegan" as that turned some people off. I might have sold them all if I had just labeled them as Almond-Raspberry-Chocolate cupcakes. Oh well. All in all, it was a success. If I get a chance to do this again next year, I'll bring more volume of things I think will sell. I could have sold 20 bags of cookies rather than just 9.

I got a lot of compliments from my customers and I was really glad everyone enjoyed the treats.

Happy Holidays!

Raquelle M. on Foodista

Progresso's New High-Fiber Soup Review & Giveaway

I am over-the-moon-excited to be able to announce Thoughtful Eating's very first giveaway! Progresso just sent me a can of their new High Fiber Homestyle Minestrone soup to try out and review. I tried it for dinner in one of their soup mugs and with one of their soup spoons; a total Progresso experience. This new line of soups currently comes in 4 different flavors and boasts 28%

Review:

I'm very impressed with the High Fiber Homestyle Minestrone which had some good-size pieces of penne pasta, kidney beans, garbanzo beans, peas, celery, carrots, potatoes, greenbeans and spinach in a tomato broth. At first taste, it was noticeably bland. This is because the soup is low-sodium and when I added salt to taste the flavors really opened up. Soups really should come as low-sodium as possible to ensure freshness. Besides, it's healthier for you and you can add your own seasonings later. The tomato broth was really smooth and not watery at all. It has just the right flavor with no sign of acidity. The potatoes, penne pasta, peas, garbanzo beans and red kidney beans really held up. The green beans, carrots and celery were a bit mushy and could have been a bit bigger in size. I judge canned soup by the ratio of liquid to ingredients. By the time you've eaten up all of the yummy ingredients swimming around in your bowl, how much liquid is left? To me a bad soup has a higher ratio of liquid to ingredients. This particular soup had a pretty good ratio and what liquid was leftover was nice and thick and I felt like I had more soup to eat rather than more liquid to drink. The soup was filling and I think that's because of the various beans and the pasta.

I wish Progresso would tell us how they added the extra fiber. They claim that each soup has 7 grams of fiber per serving and serves as 28% of the average person's recommended fiber intake. With my stomach issues, my doctors have recommended increasing the fiber in my diet so eating these soups will be very beneficial to me. But where does that extra fiber come from?

Progresso's High-Fiber soup comes in four flavors. Creamy Tomato Basil, Hearty Vegetable and Noodles, Chicken Tuscany and Homestyle Minestrone. I would like to try all four but the only other one that calls out to me is Hearty Vegetable and Noodles.


Giveaway:

Here are the rules for the giveaway!

1) Tell me which of the four Progresso High-Fiber soups you are most interested in. You can tell me in the comments section of this post or e-mail your pick to QuelleLove at gmail dot com.
2) Get your entry in by December 29th, 2009.
3) The winner will be announced here on December 30th.
4) If you are a winner, be willing to provide me with your name, a mailing address and e-mail address. Progresso will be mailing you your winning package.
5) Although I'm asking you which flavor you are most intersted in, you cannot chose which soup you will get in the giveaway package. Progresso will pick that at random. Sorry!

Here is what you can win:

1 can of Progresso High-Fiber soup. 2 Progresso soup mugs with lovely thumb rests and 2 Progresso soup spoons.


Progresso Giveaway

Caldo Verde ~ Portuguese Kale Soup


Caldo Verde translated literally into Portuguese means "Green Pot". My father hails from mainland Portugal. Growing up, I took several trips out there and it was pretty common for my family and I to consume numerous bowls of Caldo Verde. The most common type involves a broth-based potato soup, blended until smooth and to which strips of kale and a few pieces of chorizo are added. A lot of people like the clean cut look of collard strips and use them instead of kale. I consider those people heathens! You can't make kale soup without kale. I spit on your collard soup. ::spit::. I have never made this soup with carrots and I tried adding  it to my basic recipe. There are a lot of variations of this soup. You can easily make it with just potatoes, kale and water (with salt and pepper). However, the addition of onions, garlic and carrots makes it truly wonderful. Next time I'll try adding kidney beans.

I really hope you'll take the opportunity to make this very special soup. It's a staple of Portuguese cuisine and makes for a hearty winter soup.
--------
Ingredients:

1/2 large onion chopped
- or small onion chopped
3 carrots peeled and sliced
3 garlic cloves smashed
4 large yellow potatoes chopped
2 chorizo links with casings removed, halved and chopped
4 cups of chicken stock and 2 cups of water
1 bunch of kale julienned
- or 6 cups of water and 2 packets of Chicken Boullion
crushed red pepper flakes
salt and pepper to taste


Chop your onions, slice your carrots and smash your garlic. Set aside.


Go on. Peel with your bad self! Peel and chop the potatoes. Set aside in a bowl of cold water.


Remove the casing from your chorizo. This is an important step. Chorizo casing is tough and unforgiving and will make the sausage link curl during the cooking process. Just remove it and don't worry about appearance. Cut the links length-wise then chop into half-moons. Sautee in a separate pan until the are nice and browned. Don't put into the pot until the last minute, otherwise the color of the chorizo will leach into the soup turning it a weird red color.


Now it's time to prepare the kale. With each individual leaf, cut out the stem. You can do this several ways. Cut a triangle out of the leaf, or fold over the leaf and cut out the stem that way. Or rip off the halves of the leaves off the stem. I like a little bit of stem to give some crunch and texture.


Tightly roll the leaf into a bundle.


Run your knife over it to julienne the leaf into thin strips.


Don't worry if it's not perfect.


In a big pot, sautee your onions, carrots and garlic in a bit of olive oil.


Once the vegetables start to soften, add the potatoes and some crushed red pepper flakes. Stir the pot and cook the potatoes until they just begin to soften around the edges.


Then add the 6 cups of water and 2 bouillion packets (or 4 cups of broth and 2 cups of water) to the pot. Bring to a boil then let simmer until the potatoes are cooked.


With a wooden spoon, mash the potatoes against the side of the pot. Do this until almost all the chunks of potatoes are mashed. Leave some chunks behind. This will give your soup a good texture.


Now it's time to add the Kale. It will seem like you have too much kale for your pot. But not to worry because the kale wilts down pretty quickly.


Cook for 5 minutes at a simmer then stir in chorizo sausage. Serve hot or at room temperature (the latter is my favorite). Eat with a nice crusty loaf of Portuguese bread. Enjoy!

Portuguese Kale Soup on Foodista

Guest Blogger Adriana ~ Adriana's Mocha Chocolate Chip Cookies

My friend Adriana garners my respect because she is truly a wonder to behold. Adriana speaks several languages, is well-read, writes poetry, plays the piano and is a talented baker. Her intelligence boggles my mind and I'm convinced that she has extra brains that she keeps somewhere. She writes the ever interesting blog The Obsessive Rereader and she's great to follow on Twitter (@TheReReader). I was very excited when she told me she was interested in a guest post and the one she submitted is a gem!

I think it's interesting that Adriana's recipe calls for confectioner's sugar and brown sugar for the dough and granulated sugar for dipping. I'm sure the different types of sugars combined is what makes them so delightfully crispy. And coffee accompanies chocolate so well so this would be a real treat for someone looking for a variation on standard chocolate chip cookies.

Hope you'll try out her recipe, check out her blog and follow her on Twitter.
------------------

I don’t know how I lived to be 28 without ever making chocolate chip cookies, but it’s true. For the past year I’ve been baking oatmeal raisin cookies pretty regularly, but it was my husband who finally said last week that I should make chocolate chip cookies. So I went through my cooking magazines and recipe books and finally chose a recipe for mocha chocolate chip cookies. They were easy to make and really delicious! Disclaimer: they come out very crispy, so if you like crispy, you’ll love them, but if you generally prefer softer cookies, then maybe this is not the recipe for you.

Here’s what you need:

2 cups all-purpose flour
½ tsp. baking powder
¾ tsp. ground cinnamon
¼ tsp. table salt
2 ½ sticks unsalted butter, softened at room temperature
3 Tbsp. instant espresso powder (or ¼ instant coffee granules, crushed)
1 cup confectioners’ sugar
½ cup packed light brown sugar
1 ½ cup semisweet chocolate chips
about ¼ cup granulated sugar for dipping


Position a rack in the center of the oven and preheat oven to 350 F. Baking time: 12-14 minutes. Recipe yields about 4 dozen cookies

You’ll notice that this recipe has no eggs. The good news is that this means you can taste the dough any time you want. The bad news is that butter is your only binding agent, so you have to make sure it’s thoroughly softened before you begin mixing. Err on the side of too soft rather than not soft enough.

In a medium bowl, combine the flour, baking powder, cinnamon, and salt. In a separate bowl, combine your confectioners’ sugar and your brown sugar.

For my cookies, I chopped up some bittersweet chocolate that I had leftover from something else, but it wasn’t enough, so I also used some semisweet Hershey’s chocolate chips. I floured them so they wouldn’t sink, but then found out that wasn’t strictly necessary -- the cookies come out pretty flat, so the chips can’t sink very far.

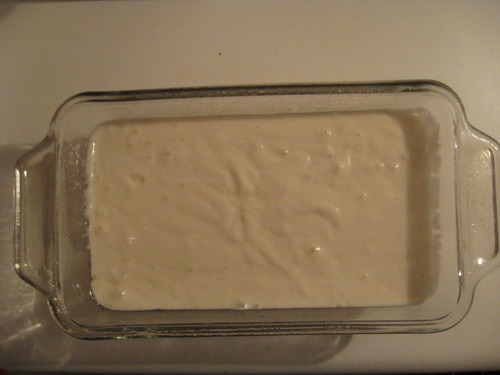
In a large bowl, beat the butter and espresso powder with a hand mixer on medium speed until well combined. Add the confectioners’ sugar and brown sugar and mix until well combined. Stir in the flour mixture about ½ cup at a time, mixing well after each addition. At this point you can turn off the mixer and stir in the chocolate chips with a wooden spoon. This is what your dough will look like:


Put the granulated sugar in a shallow bowl. Scoop out about 1 Tbsp. dough and flatten it slightly. Dip one side into the sugar and then set the disk, sugar side up, on an ungreased baking sheet. Repeat with the remaining dough, spacing the cookies about 2 inches apart. Attention: they do flatten out and expand quite a bit while in the oven, so don’t be skimpy on the space. I ended up needing four cookie sheets, but two of my sheets are rather small, so you might be able to do it with only three.


Bake until the edges start to darken, or about 12-14 minutes. Let the cookies cool for 1-2 minutes on the cookie sheet, then transfer to a cooling rack lined with paper towels to cool completely.


When I pulled my first batch out, I was surprised by how flat they were, but it’s very normal, given that there are no eggs in the dough. And they are delicious! They’re crispy and buttery, yet they have a bit of chewyness as well, especially when they’re still warm. I will definitely make these again. Enjoy!


Mocha Cookies on Foodista

Vegan Almond-Raspberry-Chocolate Cupcakes ~ The Recipe


Ingredients

Egg Replacement:
1/2 cup vanilla soymilk
1 teaspoon of apple cider vinegar

Dry Ingredients:
1-1/4 cup of all-purpose flour
1/2 teaspoon of baking soda
1/4 teaspoon of baking powder
1/4 teaspoon of salt
1/3 cup of granulated sugar

Wet Ingredients
Egg replacement (see above)
1/4 cup of canola or extra-light olive oil
1/2 teaspoon of almond extract

Filling:
Seedless Raspberry Jam (with Pectin not Gelatin)

Topping:
Duncan Hine's Creamy Homestyle Frosting - Classic Chocolate
*make sure you read the label carefully so that the frosting you chose does NOT have milk products.

Preheat oven to 350 degrees.


In a cup, measure out 1/2 cup of soymilk and add 1/2 teaspoon of apple cider vinegar. Stir and set aside for about 8-10 minutes. The soymilk will curdle a bit and this will act like the binding agent in the batter.


Mix dry ingredients: flour, baking soda, baking powder, salt and sugar.


Mix wet ingredients into the dry. Oil, egg replacement and almond extract.


Line your cupcake tin with 8 cupcake liners. This is where it gets tricky. You need to make sure you distribute everything evenly otherwise you'll get a wonky cupcake or only 7. Using half the batter, fill in the 8 cupcake liners evenly. Then add a very small spoonful of raspberry jam to the top of each. Then evenly distribute the batter to all the cupcakes, covering the jam thoroughly.


Bake in the oven at 350 degrees for 20 minutes. Let cool. Then frost with room-temperature frosting. Cold frosting will break apart those lovely soft cupcakes.


-----
It took me a lot of experimentation to get this recipe just right so that the jam wouldn't sink to the bottom. It's easily double and tripled and quadrupled so don't feel like you have to only make 8 cupcakes.

Enjoy!

Vegan on Foodista

Vegan Almond-Raspberry-Chocolate Cupcakes ~ The Story Behind the Recipe

I thought it would be good idea to provide some background on the creation of this dessert before I give you the actual recipe. In the first of this two-part post, I will give you a bit of the history behind the dessert. It's a good way to build up anticipation for when I post the real recipe.

Some months ago, I found myself drooling over Smitten Kitchen's recipe for Almond Raspberry Layer Cake. If you are familiar with Smitten Kitchen, you know that it is written by an expert baker who happens to have some serious photography skills. I spent a good twenty minutes just salivating over the images of this cake. I really wanted to make it  but a few things were going against me though. First of all, I don't own any cake pans. Second of all, I'm horrible at any baking that requires delicacy or precision. Third of all, I have no way of transporting a cake to potential guinea pigs, thus forcing myself to eat the whole thing myself or to throw most of it away. So after evaluating my various obstacles, I decided to make this a cupcake instead because 1) cupcakes are easy 2) I have muffin/cupcake tins 3) I have tupperware suitable for transporting said cupcakes.

Turning the cake into a cupcake was challenge enough, but I wanted to do something to make them extra special, extra unique; in other words, I wanted to make this recipe mine. After reading the excellent vegan blog Strawberry Hedgehog, I had started making vegan cupcakes. At first I just made chocolate-hazelnut cupcakes with Ghiradelli's Chocolate Hazelnut hot cocoa mix (which is vegan friendly). Then I made vanilla vegan cupcakes with strawberry filling, which were only partially vegan because the strawberry jam had gelatin instead of vegan-friendly pectin. To replace the eggs in the cupcakes, I use the curdled soymilk method and to which there is a formula.

2 eggs = 1/2 cup of vanilla soymilk + 1 teaspoon of apple cider vinger

When I made my first batch of vegan cupcakes, they were so incredibly light and moist and delicious that I stopped making non-vegan cupcakes altogether.

So why did I make vegan cupcakes to begin with? My friend Gina went vegan a couple of years ago after years of being just vegetarian. Whenever there was a function in which friends were bringing food, I tried to bring some vegan-friendly dessert so that Gina wouldn't be left out (who likes to be left out? I know I don't!). This past Fourth of July, Gina threw a potluck party at her place and I thought that the event would be a good opportunity to debut the Vegan Almond-Raspberry-Chocolate cupcakes. If anything, there would be lots of willing guinea pigs to try out the dessert.

I had to make sure that the three main elements in this dessert were all vegan friendly. I like to use PETA's listing of "accidentally vegan" products because they list brand names and they have a baking section! It's not surprising that a lot of products on the market are accidentally vegan because I'm sure company's cut costs by taking out animal products which I'm sure are more expensive than vegetable-based products. I was worried about the chocolate frosting for the cupcakes, but luckily Duncan Hines Creamy Home-Style Frosting in Chocolate was on the list! Almond Extract would be no problem since it's also vegan friendly. It was difficult to find seedless Raspberry jam without gelatin in the regular grocery store but my favorite high-end produce market Wilson Farms carried their own brand of pectin raspberry jam! So once I had all the main elements together, I was in business!

Next up: The Recipe!


Vegan on Foodista

Impromptu Trifle ~ A Tragedy

My story starts with some lovely strawberries.


They were about to go bad so I needed to do something with them ASAP. I really wanted to make a dessert that incorporated sliced & sugared strawberries. Market Basket had a sale this weekend on Jello Pudding mix and Betty Crocker Cake Mix ($1!!!) so I had these on hand.


So what do I do with some strawberries, a package of Jello Vanilla Pudding and some Cake Mix? Make some Impromptu Trifle!


So I sliced those lovely strawberries...


And smothered them in sugar.


My beau Carlos goes through my eggs like something fierce, so I didn't have the 3 eggs needed for the cake mix. So I made do with my vegan egg replacement (post on that to come) which was 3/4 cup of soymilk plus 1-1/2 teaspoons of apple cider vinegar.


I baked most of the mix in a greased loaf pan at 350 degrees for about 40 minutes. It looked fine when it came out.


But then I took it out of the loaf pan and it broke.


Another disaster: I made the grave mistake of using soymilk instead of real milk with the Jello pudding mix. It didn't set. So I had pudding gloop instead.


I was determined to make this dessert no matter how catastrophic it came out. So I took some broken cake and sprinkled some rum on it.


Then I smothered the broken cake with the pudding gloop and topped it off with strawberries. It was edible. My resident guinea pig Carlos liked it, especially how mushy the cake was. That was the part I hated the most! In the end, we had our dessert to cap off our meal so all's well that ends well.

Lessons Learned:
#1 Make a pound cake or buy lady fingers for a trifle. Don't use cake mix.
#2 Never, I repeat NEVER use Soymilk instead of milk with Jello Pudding mix.
#3 Sheer determination in making a dessert, even against all odds, can have mixed results. But it's worth it.

So be brave. Forge ahead. Bake like you've never baked before! And never be afraid to experiment.